

There are a several ways where resistance band lunges can make sense:
- You want to add some extra volume for your legs and glutes after a workout with free weights and machines.
- You workout at home.
- You are a beginner and you need a precursor for free weight leg strengthening exercises.
- You are recovery from an injury and need low impact resistance training to re-strengthen yourself.
- You want simply want some exercise variety (which can also be great for hypertrophy).
With that, you can see that nearly everybody will find resistance band lunges beneficial, one way or another OR at some point in time.
In this article, we’re going to discuss what type of band works best for banded lunges, how to do the movement correctly, the muscles that you’ll work, the benefits, and some good alternatives that you can add into your routine.
Let’s get started!

WHAT TYPE OF BAND WORKS FOR LUNGES?
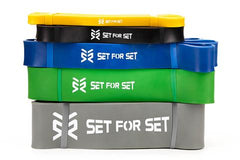
We are recommending that you have 41" heavy-duty loop resistance bands, rather than resistance tube with handles attached. The 41" loop bands are the best as they are more versatile in terms of how they can be used and resistance. Essentially, you have more variety with your exercises and a greater range of resistance.
The reason the 41" loop bands are so useful for lunges is because they can be stretched adequately and positioned on your body in many different ways. You won't be able to do the same number of lunge variations with other bands, plain and simple.
In terms of resistance, most 41" loop bands range from 10lbs to 170lbs. With bands, the more they stretch, the more tension is created, and thus resistance. So a single band will have a range of resistance (and you can control it by how much tension you create on the band).
Resistance tubes usually have a much lower range of resistance and they are not as stretchable. Moreover, you can't anchor resistance tubes in the same way as you can with loop bands.
All in all, 41" loop bands can be used in all of the same ways as resistance tubes with handles, plus a whole lot more. You'll see with a couple of the exercises below that they wouldn't be possible with resistance tube bands.
If you want to learn more about why resistance loop bands are better than resistance tubes with handles, we go in-depth on that here.
Anyway, 41" loop bands, like the ones from SET FOR SET that you will see below, are WAY more common. These types of bands can be found in every gym. And if you train from home and you don't have a set of bands, you should get one as they are very useful and we aren't just saying that because we sell them. From mobility training and stretching to resistance and strength training, bands are highly advantageous.
HOW TO DO LUNGES WITH RESISTANCE BANDS (4 Variations)
There are several different variations of a resistance band lunge. We will now cover 4 of the most effective versions, so you’ll know how to do each one correctly and what the differences are.
1. Resistance Band Lunge:

The standard resistance band lunge emphasizes the glutes, quads and hip adductors.
Here's how to do it:
- To begin, stand with feet hip-width apart. Shoulders should be retracted, and core engaged.
- Double up the resistance band so you step on two of the flat sides with one foot in the center. Your hands should be holding onto the looped ends.
- From an upright standing position, take a large step back with the opposite foot.
- Now, staying tall, bring your back knee down toward the floor, lowering slowly. Your weight should be evenly distributed between the toes of your back foot and the heel of your front foot.
- Hovering your back knee above the ground for a count or two, drive through your front heel and return to a standing position, keeping the chest high.
2. Resistance Band Reverse Lunge:

This resistance band reverse lunge has resistance pulling from behind you, which places more emphasis on the hamstrings, hip adductors, and glutes, but your quads will also play a big role.
Here's how to do it:
- For this movement, you want your resistance band anchored to a squat rack/edge of a rig/vertical pole, etc. (something that won’t move as you pull on it) at about hip height.
- Once you’ve looped your resistance band around the rig and ensured that it is secure, you want to step into the loop and bring the band up around your hips.
- Step away from the rig a bit so that tension is on the band, while your body is facing away from the rig. With the band at hip level and your back to the anchor, you’ll then proceed to do a reverse lunge.
- Stand with feet about shoulder-width apart, and chest elevated. From here, take a large step backward with your right leg (with tension maintained on the band), bringing your right knee down toward the floor.
- Hovering your knee slightly above the ground for a count, keep your chest high and shoulders retracted. You’ll then press through the left front heel to drive yourself back up into a standing position.
Tension can be varied here, depending on how close or how far away you are from your anchor point. Alternate legs as you drive yourself forward and up between reps.
3. Resistance Band Split Squat:

The resistance band split squat will work the same muscles as the standard lunge, but it takes away some of the coordination demand needed to step forward or backward with one leg since you will be positioned in the split stance for the entire set. That doesn't mean your core won't be working, because it will! All lunges, including the split squat, are essentially a unilateral exercise, which means you'll be working core stability and strength in addition to the primary movers.
Here's how to do it:
- Think of a split squat as a stationary lunge…because that’s essentially what it is! To do a split squat with a resistance band, you’ll want to step into the band before beginning the movement. To begin, step on your resistance band with one foot (single loop, not the doubled loop like we used for the resistance band lunges) and bring the band up and over your head so that it rests comfortably across your upper back.
- You can then hold on to each side of the band with both hands in front of you, around chest level. You’ll know if the band is in the wrong spot, because it will be highly uncomfortable – especially if you have it wrapped around your neck!
- Once it’s in the proper position around your upper back, you can get started with your split squat. Take a large step backward with your right foot, keeping chest high and core engaged.
- From here – and with your weight on your right toes and left foot – bring your right knee toward the ground. Hover above the floor for a count or two, then drive upwards while pressing your weight through the left heel.
- Continue moving up and down without changing your stance for the desired reps.
For a split squat like this, you should perform all your reps on one leg before moving to the other side. No knee drive on this one, both feet stay planted on the floor during the course of the movement!
4. Resistance Band Lunge with Knee Drive:

This exercise – and correspondingly, the set up for it – is the same as the resistance band reverse lunge listed above, except now you’ll be adding a powerful knee drive! The knee drive not only will increase your calorie burn, but it will work your hip flexors and core considerably.
- Ensure that your band is anchored properly to a rig or pole, stepping into the loop and facing away from the anchor point as you place the band at hip level.
- Step away from the rig to provide tension to the band, standing with feet shoulder-width apart and chest high.
- From here, take a large step backward with your right leg (maintaining tension on the band), bringing your right knee down toward the floor.
- Hovering your knee slightly above the ground for a count, keep your chest high and shoulders retracted.
- You’ll then want to press through the heel of your left foot (front foot) and simultaneously drive your right knee forward, returning to a standing position while continuing the knee drive as you stand upright.
- Note that the foot shouldn’t touch the ground, if possible – the hip is flexed on the right side, with the upper thigh parallel with the ground at the top of the movement.
- Pause at the top, then return the right leg back to the floor in another large step backwards, completing the desired number of reps for this side before switching to the opposite leg.
Common Mistakes with Resistance Band Lunges
When performing these exercises, there are some common mistakes that can be noted across the board:
- Not Keeping Upright: Leaning too far forward or too far backward while descending into the lunge can be a hinderance – not only in possibly decreasing the engagement of the proper muscles, but also possibly causing injury. Staying upright with the core properly engaged will not only ensure the right muscles get worked, but will help decrease the risk of injury as well.
- Not Utilizing the Proper Muscles: Another common mistake is not pressing through the front heel to return to a standing position, or bouncing off the back foot to return to a stand. This again will underutilize the proper muscles – so really think about pressing through the front heel (with all toes gripping the ground) and engaging the glute as you come to a standing position.
- Rotating at the Hips: Another common mistake made with a lunge, especially with any added resistance, are the hips rotating. This might be noticed most often once you are fully descended in your lunge, with the hip of the back leg rotating out a bit. If this is the case, firing and engaging the glutes can often help! Think about pointing both hip bones to the front, and really squeezing the glutes during the duration of the exercise in order to help correct this rotation.
- Losing Tension on The Band: While this is not a form mistake, it is a mistake if you want to add resistance to the lunge. For example, you can see in the video with the regular lunge that the band becomes lax at the bottom of the lunge, which means that range doesn't have any additional tension. Only the top range would have tension like this. To ensure you have tension through the entire range of motion, you can wrap the band around your hand until tension is created from the bottom range or you can just hold the band down lower and pull up (this will also give you some arm activation simultaneously).
All this and more is covered in our extensive resistance band guide below.
Our guide has over 250 exercises categorized by mobility, mobilization, resistance training, barbell training, explosive training, static stretching, and (p)rehabilitation...
RESISTANCE BAND LUNGES MUSCLES WORKED
Lunges are wonderful for strengthening the lower body, as well as the core. But what muscles are specifically targeted? Let’s take a look!

The primary movers in a resistance band lunge include the glutes, hamstrings, quads, and adductors. These muscles aid in hip and knee extension and flexion, as well as stabilizing throughout the movement. Your adductors aid in keeping your thighs close, ensuring that your legs don’t flare out during the lunge.
The secondary muscles utilized within a resistance band lunge include the abdominals and the calves, along with any corresponding upper body muscles that might be holding onto your resistance band, such as the lats, biceps, and forearms.
Read this article if you want a more in-depth look at what muscles lunges work.
BENEFITS OF RESISTANCE BAND LUNGES
The benefits of resistance band lunges are numerous – after all, this movement is a powerhouse exercise for the lower body, as well as one that can improve overall performance! Let’s take a look at some of the other benefits of resistance band lunges.
- Improved coordination: Balance is key in a plethora of arenas, both in daily life as well as sports. Lunges, while both legs are on the ground, are working the lower body in a unilateral fashion, which allows you to increase both your stability as well as your balance – and therefore helping to improve your coordination. The core plays a large part in this as well, in terms of stabilizing and strengthening!
- Increased strength: Lunges are wonderful for improving strength within the lower body! With so many muscles within the legs being utilized in order to complete a lunge successfully, you’ll soon notice toner, stronger legs within a short amount of time when the resistance band lunges are done correctly.
- Improved posture: Lunges are mainly a lower body exercise, but the core certainly plays a large part in the movement – especially if resistance is added! The core muscles are worked overtime in order to maintain an upright posture, which can correlate to how you stand when you aren’t doing your lunges. Stronger legs and better posture, yes please!
- Variability: Not only can lunges be done just about anywhere, but there are so many ways that you can tweak them in order to hit your fitness and performance goals. Don’t think that you’re stuck with just one particular version of a lunge; with some modifications, this movement can work different areas of the lower body in specific ways, all while improving strength and stability.
RESISTANCE BAND LUNGE ALTERNATIVES
If you’re unsure about adding resistance band lunges into your current routine, there are some alternatives that you can do that will still help strengthen the lower body!
These can be done with or without resistance (i.e. dumbbells or kettlebells)...
1. Walking lunges:

The walking lunge is an alternative that removes the added resistance of the band but kicks up the stability portion of the movement a bit. You’ll basically be performing a forward lunge, and making your way across a designated space as you perform each rep. Weight can be added to this movement, or you can just leave it with bodyweight – either way, you’re sure to get a good burn, as well as an elevated heart rate!
2. Side lunges:

Putting a large focus on the adductors, the side lunge is a perfect exercise to ensure that you are moving correctly. Side lunges put a different focus on the glutes than a regular lunge, and can help with mechanics that bring you into lateral movements.
3. Pistol squats:

Pistols are quite the challenge – and are perfect for developing balance, coordination, and strength throughout the entire body. Form is key with pistol squats (as with any exercise), and they can take a while to master; however, the overall strength that is developed through the lower body and core are unmatched!
Other good resistance band leg exercises:
Here are some more great resistance band leg exercises that you can add into the mix for complete development of your lower body:
- Resistance band squats
- Resistance band deadlifts
- Resistance band glute kickbacks
- Resistance band leg curl
- Resistance band hip thrusts
If you wanted to do a resistance band only leg workout, it could look something like this:
- Resistance Band Front Squats x 10-12 reps
- Resistance Band Deadlift x 8-12 reps
- Resistance Band RDL x 8-12 reps
- Resistance Band Lunge x 8-12 reps each side
- Resistance Band Hip Thrust x 8-12 reps
- Resistance Band Leg Curl x 10-15 reps each side
Rest 20-30 seconds between exercises and repeat for 2-4 rounds.
For several other resistance band workouts, SFS Five will walk you through workouts created by a certified trainer.

The SFS FIVE Resistance Band Workout Package has 5 fun and challenging full length workouts using only resistance bands. Each workout targets different muscle groups. Together, the 5 workouts make for the perfect weekly workout routine.
Related content: Resistance Band Leg Workout
FINAL THOUGHTS
Resistance band lunges are the perfect compound movement to add to your workout toolbox! With all of the variations that are available - in terms of depth of the exercise, range of motion, and even implements used to add resistance - these lunges can have you building leg strength, improving core stability, and increasing general performance factors in a short amount of time. Remember, consistency, correct form, and proper programming are key.
Want more band training? Check out our Resistance Band Training e-Guide


Paulina Kairys
Author